I adore personalized anything. Put my name on it, and tiny hearts light up in my eyes. Every year I tell my husband that this is the last time I'm going to buy new stockings and every year I see a new one to fall in love with and promise yet again that this is the last time. Last year I hearted the classic red & white stockings with silver initial pins. This year I'm back to loving my favorite motif - country clutter. I found some pretty great stockings {polka dots! swoon!} from Ballard Designs that you could have embroidered with your name {double swoon!} but the price tag was pretty panic-attack inducing. Since I suck at embroidery but I really wanted to do something that put our names on our stockings and I wasn't about to shell out $30 a piece for stockings, I had to get crafty.
Enter Target.
Oh Target, how I love thee and thy awesome dollar bins. In a recent
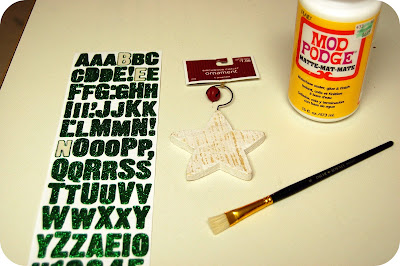
stroll through my Mecca, I found these super cute wooden star ornaments
with a simple hook to hang. Picture a light bulb going off over my
head. I grabbed up three {one for me, the hubs and the bubs} and then went off to the scrapbooking aisle for some glittery funness by way of lettering. Side
note: I could have used my Cricut to cut out the letters and
embellished with glitter myself - however, I'm still in my infancy of
collecting cartridges and I only have one font cart and it's not my
favorite. Wham, bam, thank you ma'am. $4 later and I have my personalized plaques for our stockings {and the BEST part is that if I change my mind in the future, these tags go with!}
Here's your incredibly easy how-to:
- Gather blank ornaments
- Gather embellishments {as fancy or as plain as ya wanna get - I kept mine to just the name as the surface I was working on is quite small}
- Adhere your letters and embellishments to the ornaments {in the picture below I show ModPodge as part of the items used - I didn't end up using it at all}
- Hang on stockings.

No comments:
Post a Comment